 Русский
User Manual
Contents
Editing 3D Stereo Photos and Videos
Alignment
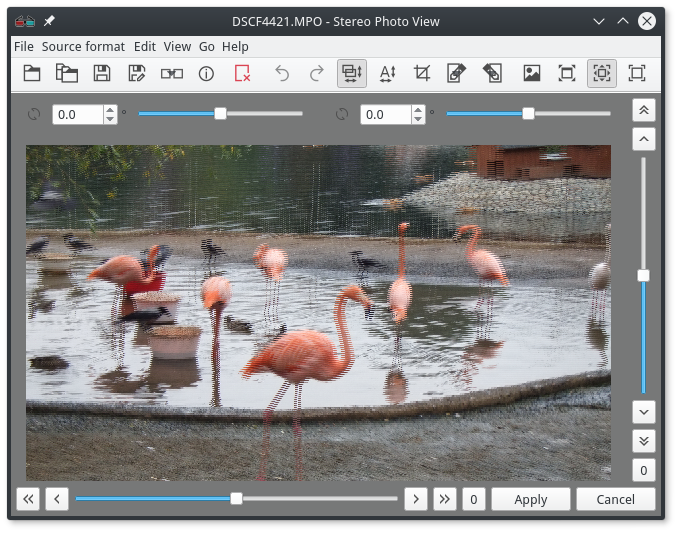
The tool “Alignment” is opened via menu “Edit” → “Alignment” or by the “A” key.
The vertical slider on the right and the “Up” and “Down” keys are used for vertical alignment.
For horizontal-slider at the bottom of the screen and “Left” and “Right” keys.
If you press these keys together with Ctrl, the angles will move in big steps.
If camera angles are taken from hands, you may need to rotate the camera angles. This is done using sliders and spinners at the top of the image.
For horizontal alignment (parallax settings), the object that will be visually located on the plane of the screen must be equalized so that on the left and right angles, it was in one place of the screen (not twofold). In this case, the objects behind it will be perceived by the eye as if they are behind the screen, and those objects that are in front of it - in front of the plane.
The left eye image on the protruding objects is to the right of the image for the right. That is, to view them you need to keep your eyes to the nose. For comfortable viewing, it is recommended not to allow too much distance between images of the same part at different angles (severe ghosting).
Vertically, you just need to combine the left and right angle so that the objects are on the same level.
Once you have achieved the desired result, click “Apply”.
Auto-alignment
Follow the menu “Edit” → “Auto Alignment” or press Ctrl+A keys.
Then, use the mouse to select a square area on the image, which will be visually located on the screen plane. To change the size of the area, use the mouse wheel.
Click the left mouse button. The program will search for key points in the selected area and align the image with them.
Extended Auto-alignment
This tool is launched via the menu “Edit” → “Extended Auto Alignment” or by Ctrl+E,A keys.
The program finds similar key points in the images and calculates the required amount of vertical, horizontal, and angle shifts. The Alignment tool described above is then opened.
In the menu “Edit” → “Settings…” you can choose which parameters will be calculated automatically: parallax, vertical displacement, rotation.
Variable scene depth in the stereoscopy video content
Stereoscopic video content can vary the distance to the main object.
In such cases you need to change the depth of the scene in accordance with the distance to the object.
On the example of temporary reduction of the distance to the object, it can be done as follows.
1. Adjust the base depth of the scene.
Use one of the tools: Alignment, Auto-alignment, or Extended Auto-alignment.
2. Place timestamps at key points.
Mark the following points: where the distance begins to decrease, where the distance ends to decrease, where the distance begins to increase, and where the distance ends to increase.
At each time, pause and press Ctrl+T (or select Edit → Add Timestamp).
3. Adjust scene depth at key points.
Select a timestamp on the timeline where the distance has finished decreasing and adjust the desired scene depth for it using one of the alignment tools.
Repeat the same at the point in time when the distance starts to increase.
As a result, during playback, the depth of the scene changes smoothly as the camera changes the distance to the object.
The result can be saved to a new video file.
Crop
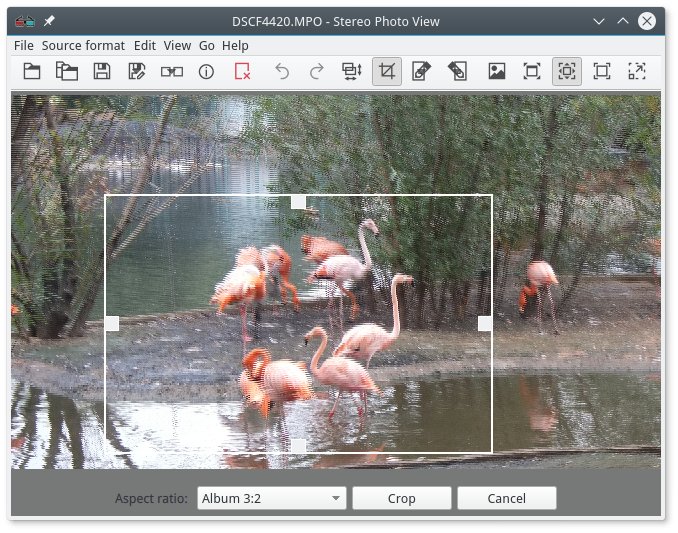
Tool “Crop” is opened via menu “Edit” → “Crop” or by pressing “C” key.
Select the desired region of the image and click button “Crop”.
In the lower pane, you can also select the desired aspect ratio of the frame.
Editing angles in an external editor
This function can be useful, for example, to remove red-eye in an external editor.
- Select the desired editor from the edit menu → Open left view in….
- The left angle should open in the selected program.
- After editing, save the file with the same name, return to the stereophotoview window, and click “Import”.